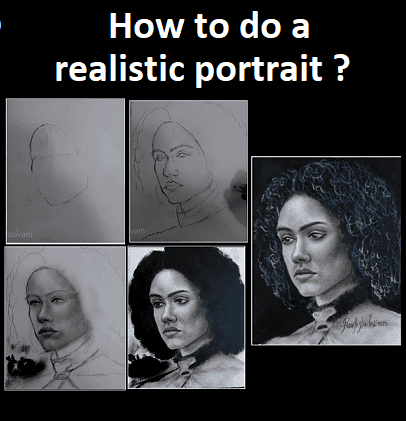
Realistic face drawing is a dream as well as a nightmare for a lot of people as they do not know where to start and how to finish the work. The features, length of the features, placement of them, angle of the features and angle of the face and several other aspects like the spacing between the features and everything creates a solid inhibition. When I started doing portrait drawing, I had these problems too. But trust me it is not that difficult as we think.
There are few measurements we should take into consideration to achieve realistic face drawing without the basic flaws. More than the resemblance that we try to bring on our portraits with a reference subject, it is important that we make the portrait without any obvious fundamental flaws. Nobody is going to question if your portrait doesn’t resemble your reference character (unless it is a commissioned work) but you will be noticed if you have fundamental flaws.
1. Realistic face drawing – Structure of the face is the key
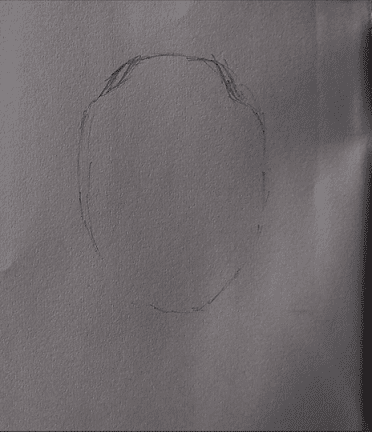
Nothing is as important as the shape of the face in a realistic face sketch. You would have heard people around you saying “she has an oval face, lengthy forehead so she is good to be a model”. How do they arrive at a conclusion that the face is oval? We all have an artist in us. You may be right about the shape of the face. Even if you are wrong about it, just go for it. Trust your instincts. I think she has a oval face.
2. Realistic face drawing – Position your features
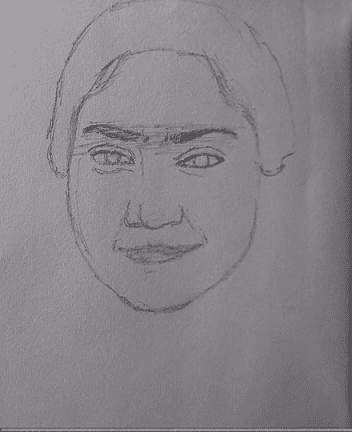
Every vertical measurement of a feature is important in a realistic face sketch. But how do I do that, how do I measure without touching the person sitting in front of me, well it comes only in practice. You yourself would have made comments about the features of celebrities like she has a such a big nose, what a wide mouth??, I find her eyes to be slightly inexpressive and so on. These maybe arrogant comments in layman terms, but when it comes to portrait drawing this is the judgement we rely on to place our features. In this case, it is not offensive to comment that she has a big forehead. Of course, she does have a big forehead but that is what completes her beautiful face. That is why she is one of the best models. To me it always felt like a big forehead completes the face perfectly.
3. Realistic face drawing – The first layer of shade
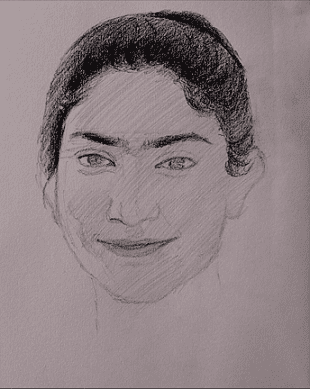
I select a midtone, a first layer of reference with which I build the rest of the layers. Skin is a beautiful creation. It has blood, flesh and several veins underneath. It has the capacity to reflect any light under which it is placed. As I have always been saying, a perfect painting is a good amount of balance between the darkest value and the highlight. The same formula applied for the portrait drawing as well. I am trying to darken wherever required, but I would like to go step by step so I do not ruin it.
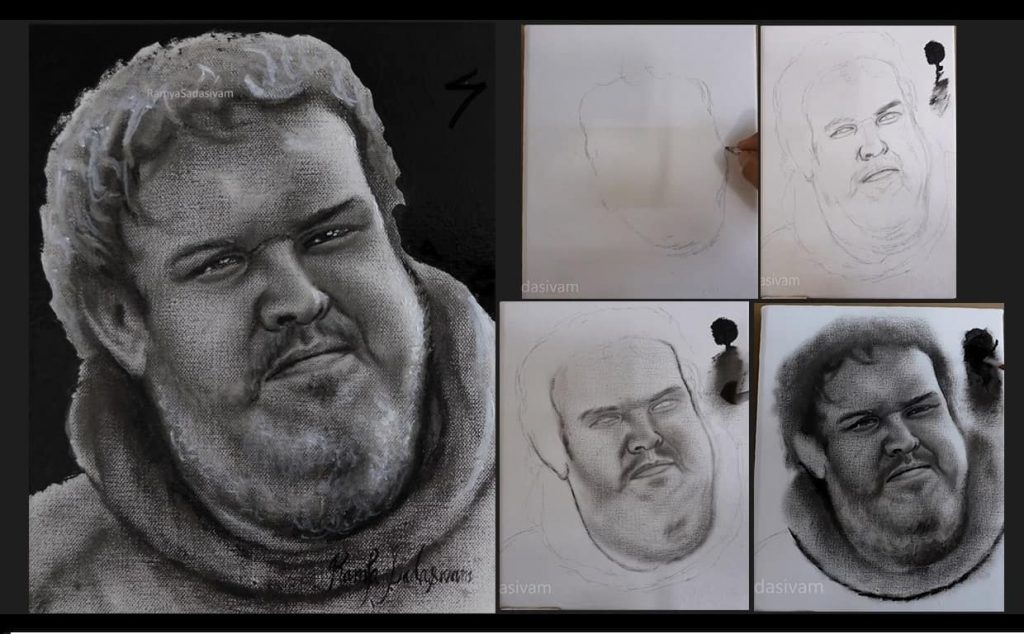
4. Realistic face drawing – Adding values & perfecting my hair
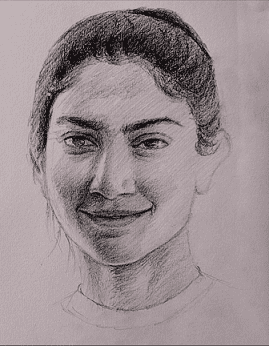
As we develop the layers on a portrait, as we keep adding values, the portrait gets closer to your subject. You may lose it if you overdo it. So keep it slow. When you keep it slow, you can gradually go back to your previous step until which your realistic face sketch looked like your character. Hair is an essential part that has the capacity to get your portrait 30 – 40% close to your subject. When it comes to hair, select a midtone and keep adding values wherever required. Remember that hair is a pattern which has a lot of randomness and there is a pattern in the randomness of hair. Try to capture it… How would you capture it? If you go strand by strand ? No…. Create the randomness using kneading eraser.
5. Realistic face drawing – The power of highlight
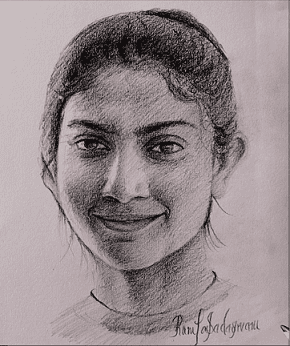
A portrait comes to life only with the vast variety of highlights you place. A kind of highlight that needs to merge totally with the skin and another kind of highlight that stands out of the skin. I would like to call the highlight that stands out as reflection of light. It is nothing but the reflection of light from the light source that falls on our subject. Skin has the capacity to reflect light and it can do it very well, believe you me.
So if you guys were all artists once, lost touch and you are wondering where to start, I guess this article was helpful to you. The very intent of this article is to keep you inspired so you can start practicing art, again! Try your realistic face sketch and share with us.
If you are new to portrait study, this article portrait drawing for beginners might interest you.
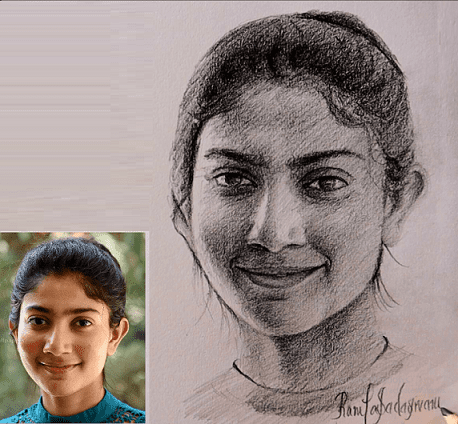
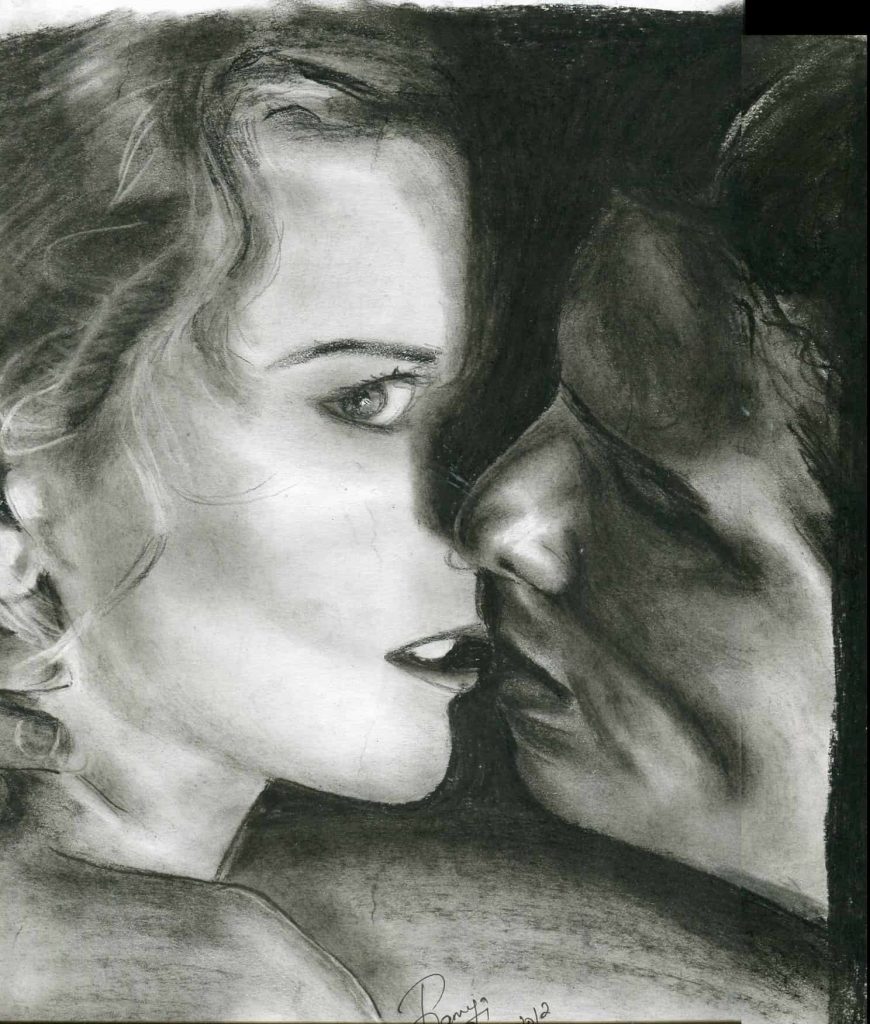
Realistic face drawing – Final output of the painting
Rules of thumb you should know to get a portrait right
Realistic face drawing tip 1 – Start your practice with monochromatic colors
Please start your practice with pencil, particularly with monochromatic colors. Monochrome by which I mean the use of black and white pencils alone. Your drawing should range only between black and white and various shades that are between black and white. Never start your practice with color pencils or color pastel or oil. After you feel that you have progressed or confident enough to create a good portrait in pencil, you can switch to color.
Realistic face drawing tip 2 -Never practice from a photo
A photograph does not capture all the values that are there on a face or as a matter it is not possible to capture the values of any subject. Even a photo taken by a good photographer is very flat. Most of the highest values in the absence of light zone and lowest values in the presence of light zone would go missing. Most of the time they are not captured or simply not visible. So it is best to practice from life.
Realistic face drawing tip 3 -Learn light theory
It is very very important to understand light. A good drawing or a painting is an appropriate balance between the highest values and the lowest values that you set. in an artwork. To understand this idea and also the technical language of it, you should learn light theory. This will help you a lot to bring realism and sensitivity in your drawing or painting.
Realistic face drawing tip 4 -Learn the basics of portrait drawing
By basics I mean the facial features and construction of the face. It is very important to learn the planes, division and structure of each features. It is vital to know the facial construction which will help you place the features in the respective sockets correctly. So learn the basics.
How to make a drawing realistic
There are only two ways to make a drawing realistic or hyper-realistic. After practicing portrait, facial construction and light using pencils, either shift to charcoal or dry brush technique. Pencil always gives you a very grey shade, but we need darker values like black to achieve realism. Easiest way to achieve this is by shifting to either charcoal which will give you a very desirable dark tone or by using dry brush technique where you will take the help of black paint.
Charcoal for realistic face drawing
Charcoal is one of the best ways to achieve realistic face drawing. The darkness that a charcoal stick could achieve is so deliciously outstanding. This darkness the stick has would give has the opportunity to create millions of values between black and white. To begin with, start your practice using hard charcoal pencil, then make your gradual shift to soft charcoal pencil and later on you can move to charcoal stick.
I used to be a big fan of charcoal however it gave me tremendous respiratory problems paving way to chronic irritated nose and cold. That was the reason I stopped using charcoal for my works about 6 years ago. You can either create charcoal drawings using traditional pencil shading technique or use dry brush technique using the charcoal powder.
Dry brush technique for realistic face drawing